> ## Documentation Index
> Fetch the complete documentation index at: https://dps.equinoxroleplay.com/llms.txt
> Use this file to discover all available pages before exploring further.
# ShareX Evidence Capture
> Install and configure ShareX for department evidence uploads
## **Overview**
ShareX is the department-approved application for capturing and uploading visual evidence.
Officers should use ShareX when documenting:
* Radar readings
* Traffic-camera results
* CCTV footage
* Vehicle or suspect information
* Evidence found during an investigation
* MDT records requiring visual documentation
* Other relevant on-screen information
The department provides access to a FiveManage media-upload service. Officers are not expected to purchase their own subscription.
Download ShareX from the official website.
Never post, stream, photograph, or publicly share the department's FiveManage authorization token. Only obtain the current token through an approved private department channel.
***
## **Installation and Configuration**
Download ShareX from the official website:
[https://getsharex.com/](https://getsharex.com/)
Install the application and open it after installation is complete.
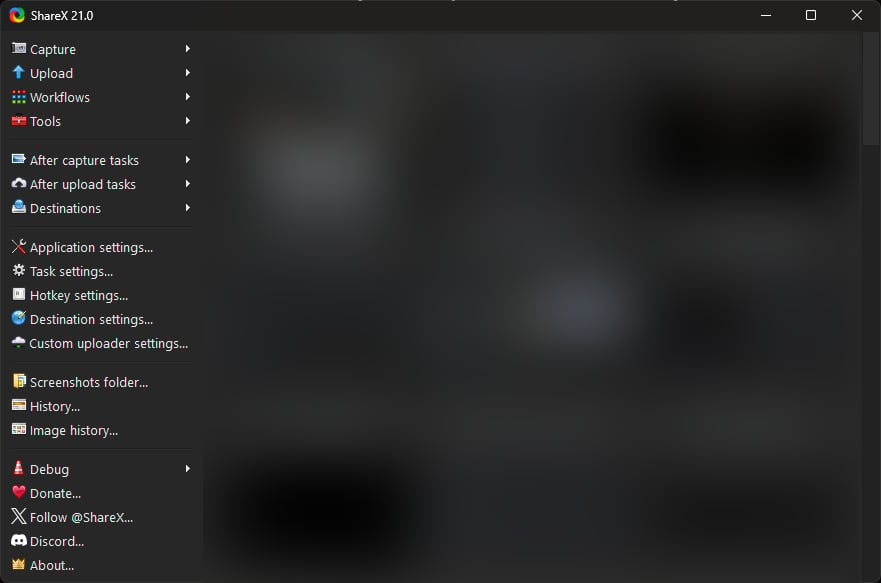 From the ShareX main window, navigate to:
**Destinations → Custom Uploader Settings**
From the ShareX main window, navigate to:
**Destinations → Custom Uploader Settings**
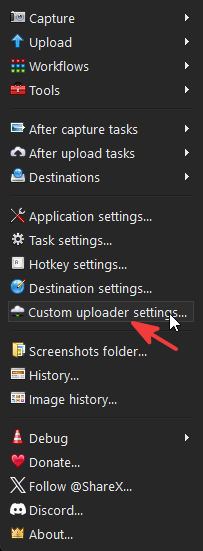 The Custom Uploader Settings window will initially appear empty if no custom uploaders have been configured.
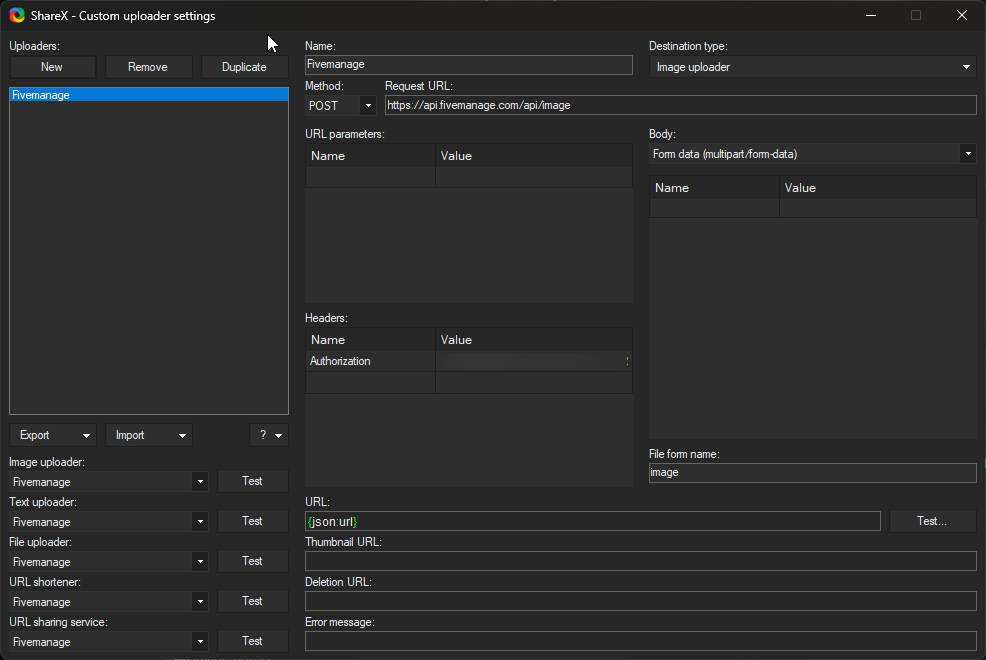 Select **New** and enter the following configuration:
| Setting | Required Value |
| ---------------- | ---------------------------------------- |
| Name | `FiveManage` |
| Destination Type | `Image Uploader` |
| Request Method | `POST` |
| Request URL | `https://api.fivemanage.com/api/v3/file` |
| Header Name | `Authorization` |
| Header Value | Department-issued media token |
| File Form Name | `file` |
| Response URL | `{json:data.url}` |
The authorization token is intentionally not included in this handbook. Contact LSPD Command through the approved private channel to receive the current token.
Compare your configuration with the examples below.
Set the uploader name to:
```text theme={"dark"}
FiveManage
```
Select **New** and enter the following configuration:
| Setting | Required Value |
| ---------------- | ---------------------------------------- |
| Name | `FiveManage` |
| Destination Type | `Image Uploader` |
| Request Method | `POST` |
| Request URL | `https://api.fivemanage.com/api/v3/file` |
| Header Name | `Authorization` |
| Header Value | Department-issued media token |
| File Form Name | `file` |
| Response URL | `{json:data.url}` |
The authorization token is intentionally not included in this handbook. Contact LSPD Command through the approved private channel to receive the current token.
Compare your configuration with the examples below.
Set the uploader name to:
```text theme={"dark"}
FiveManage
```
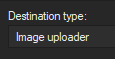
 Set the destination type to:
```text theme={"dark"}
Image Uploader
```
Set the destination type to:
```text theme={"dark"}
Image Uploader
```
 Set the request method to `POST` and use:
```text theme={"dark"}
https://api.fivemanage.com/api/v3/file
```
Set the request method to `POST` and use:
```text theme={"dark"}
https://api.fivemanage.com/api/v3/file
```
 Add the following header:
| Name | Value |
| --------------- | ---------------------------------- |
| `Authorization` | `7fSprCDfgnhM3ICFfoxAm493waDepdr2` |
Add the following header:
| Name | Value |
| --------------- | ---------------------------------- |
| `Authorization` | `7fSprCDfgnhM3ICFfoxAm493waDepdr2` |
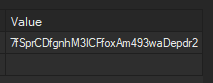 Any screenshot used in this guide must have the token completely removed or replaced with a fake placeholder. Blurring it is not recommended if the original image remains publicly accessible.
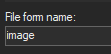
Set the file form name to:
```text theme={"dark"}
file
```
Any screenshot used in this guide must have the token completely removed or replaced with a fake placeholder. Blurring it is not recommended if the original image remains publicly accessible.
Set the file form name to:
```text theme={"dark"}
file
```
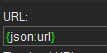
 Set the response URL to:
```text theme={"dark"}
{json:data.url}
```
Set the response URL to:
```text theme={"dark"}
{json:data.url}
```
 Select **Test** next to the Image Uploader configuration.
ShareX will ask you to select an image. Choose a non-sensitive test image.
A successful test should return a FiveManage link similar to:
```text theme={"dark"}
https://r2.fivemanage.com/TEAM_ID/IMAGE_ID.webp
```
Open the returned link and confirm that the correct image loads.
Return to the ShareX main window and navigate to:
**Destinations → Image Uploader → Custom Image Uploader**
Select **Test** next to the Image Uploader configuration.
ShareX will ask you to select an image. Choose a non-sensitive test image.
A successful test should return a FiveManage link similar to:
```text theme={"dark"}
https://r2.fivemanage.com/TEAM_ID/IMAGE_ID.webp
```
Open the returned link and confirm that the correct image loads.
Return to the ShareX main window and navigate to:
**Destinations → Image Uploader → Custom Image Uploader**
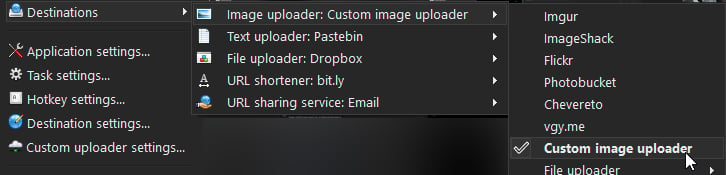 Ensure that **FiveManage** is the selected custom uploader.
Open the ShareX task menus and enable:
**After Capture Tasks**
* `Upload image to host`
**After Upload Tasks**
* `Copy URL to clipboard`
This allows ShareX to upload the captured image and automatically copy the evidence link.
Selecting Custom Image Uploader does not automatically enable uploads. The `Upload image to host` after-capture task must also be enabled.
***
## **Capturing Evidence**
To capture a selected area:
1. Open ShareX.
2. Select **Capture → Region**, or use your configured region-capture hotkey.
3. Select the relevant portion of the screen.
4. Review the image for unrelated or sensitive information.
5. Complete the capture.
6. Wait for ShareX to upload the image.
7. Paste the copied FiveManage link into the appropriate MDT report, evidence entry, or case file.
Use a region capture whenever possible. This keeps the evidence focused and reduces the chance of exposing unrelated applications, messages, or personal information.
***
## **Evidence Standards**
ShareX must only be used for legitimate department or investigative purposes.
When capturing evidence:
* Include enough surrounding information to establish context.
* Make sure names, plates, radar readings, or other relevant details are readable.
* Do not intentionally crop out information that changes the meaning of the evidence.
* Do not edit an image in a way that misrepresents what occurred.
* Redact unrelated personal or out-of-character information before uploading.
* Do not upload memes, personal images, or unrelated server content.
* Attach the resulting link to the correct report or evidence entry.
* Preserve the original capture when requested by a supervisor or the Department of Justice.
ShareX includes blur and pixelation tools, but these should only be used to protect unrelated sensitive information—not to conceal relevant evidence.
***
## **Troubleshooting**
| Problem | Likely Cause | Resolution |
| ------------------------------------- | ------------------------------------------ | ----------------------------------------------------- |
| `401 Unauthorized` | Missing, incorrect, or expired token | Obtain the current token from LSPD Command |
| `403 Forbidden` | Token lacks permission or has been revoked | Contact LSPD Command |
| `URL is empty` | Incorrect response path | Confirm the URL field is `{json:data.url}` |
| Upload test fails | Incorrect endpoint or file form name | Confirm `/api/v3/file` and file form name `file` |
| Wrong service opens | Incorrect destination selected | Select `Custom Image Uploader` |
| Image captures but does not upload | Upload task is disabled | Enable `Upload image to host` |
| Upload succeeds but no link is copied | Clipboard task is disabled | Enable `Copy URL to clipboard` |
| Screenshot includes the wrong monitor | Incorrect capture mode | Use `Capture → Region` instead of full-screen capture |
If the configuration appears correct but uploads continue to fail, take a screenshot of the error message without displaying the authorization token and contact a supervisor.
***
## **Setup Complete**
Once your test image uploads successfully, the FiveManage link opens correctly, and uploaded URLs are copied to your clipboard, ShareX is ready for department use.
Ensure that **FiveManage** is the selected custom uploader.
Open the ShareX task menus and enable:
**After Capture Tasks**
* `Upload image to host`
**After Upload Tasks**
* `Copy URL to clipboard`
This allows ShareX to upload the captured image and automatically copy the evidence link.
Selecting Custom Image Uploader does not automatically enable uploads. The `Upload image to host` after-capture task must also be enabled.
***
## **Capturing Evidence**
To capture a selected area:
1. Open ShareX.
2. Select **Capture → Region**, or use your configured region-capture hotkey.
3. Select the relevant portion of the screen.
4. Review the image for unrelated or sensitive information.
5. Complete the capture.
6. Wait for ShareX to upload the image.
7. Paste the copied FiveManage link into the appropriate MDT report, evidence entry, or case file.
Use a region capture whenever possible. This keeps the evidence focused and reduces the chance of exposing unrelated applications, messages, or personal information.
***
## **Evidence Standards**
ShareX must only be used for legitimate department or investigative purposes.
When capturing evidence:
* Include enough surrounding information to establish context.
* Make sure names, plates, radar readings, or other relevant details are readable.
* Do not intentionally crop out information that changes the meaning of the evidence.
* Do not edit an image in a way that misrepresents what occurred.
* Redact unrelated personal or out-of-character information before uploading.
* Do not upload memes, personal images, or unrelated server content.
* Attach the resulting link to the correct report or evidence entry.
* Preserve the original capture when requested by a supervisor or the Department of Justice.
ShareX includes blur and pixelation tools, but these should only be used to protect unrelated sensitive information—not to conceal relevant evidence.
***
## **Troubleshooting**
| Problem | Likely Cause | Resolution |
| ------------------------------------- | ------------------------------------------ | ----------------------------------------------------- |
| `401 Unauthorized` | Missing, incorrect, or expired token | Obtain the current token from LSPD Command |
| `403 Forbidden` | Token lacks permission or has been revoked | Contact LSPD Command |
| `URL is empty` | Incorrect response path | Confirm the URL field is `{json:data.url}` |
| Upload test fails | Incorrect endpoint or file form name | Confirm `/api/v3/file` and file form name `file` |
| Wrong service opens | Incorrect destination selected | Select `Custom Image Uploader` |
| Image captures but does not upload | Upload task is disabled | Enable `Upload image to host` |
| Upload succeeds but no link is copied | Clipboard task is disabled | Enable `Copy URL to clipboard` |
| Screenshot includes the wrong monitor | Incorrect capture mode | Use `Capture → Region` instead of full-screen capture |
If the configuration appears correct but uploads continue to fail, take a screenshot of the error message without displaying the authorization token and contact a supervisor.
***
## **Setup Complete**
Once your test image uploads successfully, the FiveManage link opens correctly, and uploaded URLs are copied to your clipboard, ShareX is ready for department use.